This trip was taken on a rainy Saturday and included stops at Bow Falls, downtown Banff, and Lake Louise. Let’s just say, my upper respiratory tract infection was not the only thing that took my breath away today. Enjoy.


This trip was taken on a rainy Saturday and included stops at Bow Falls, downtown Banff, and Lake Louise. Let’s just say, my upper respiratory tract infection was not the only thing that took my breath away today. Enjoy.
I got inspiration to pick up my camera lately. Specifically, I have been shooting architecture using a more wide-angle approach. Here are some hand-picked photos from around campus.


I’m still into cityscapes…

…and interesting textures.

~
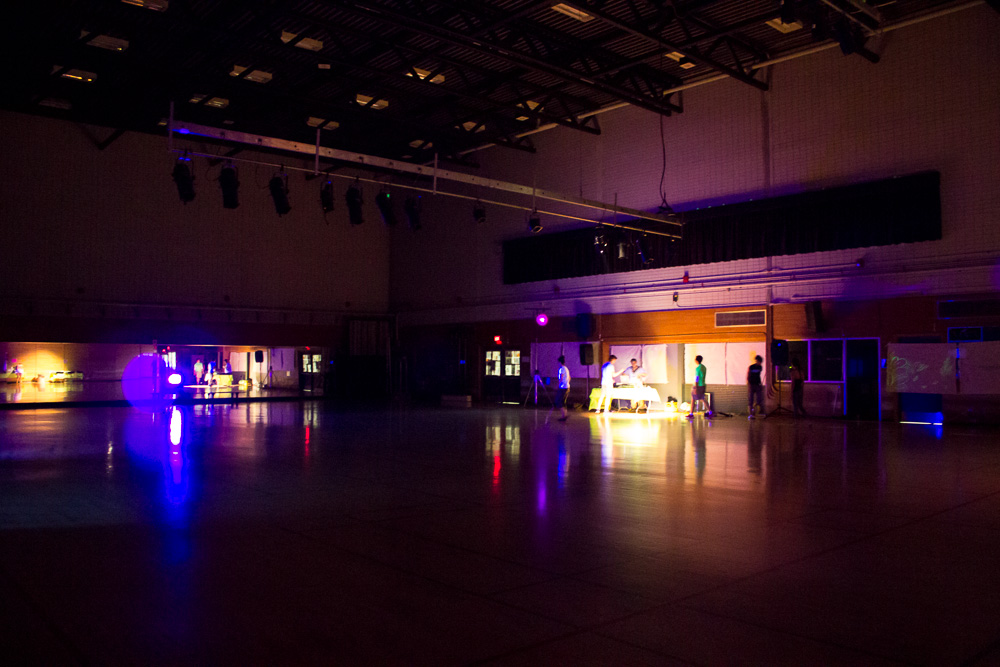
A couple nights ago I attended an event called “Flow in the Dark” hosted by a well known student group that I am a part of here on campus. Basically, the concept was to hold a blacklight (flow) yoga class that combined yoga with a nightclub-like atmosphere. It was a year kickoff event that the group had been planning since the end of last school year.We had a great turnout (as you will see).
In terms of photographic styles, I had never done anything quite like this before. The low lighting conditions combined with the movement of the “yogis” were the main difficulties. I did some research before the big day and made some notes:

I did borrow a tripod from my friend, but through most of the night, I ended up just sticking to using a really high ISO and a very large aperture (“quick handheld shots”) because I needed to be on my feet. Because of these restricted settings, much of the depth and quality was lost in the photos. To remedy some of the graininess in the photos, noise reduction had to be applied in Lightroom during post-processing. I took advantage of the time during sound/light check to play around with camera settings with the tripod. I tried a deeper depth of field and a lower ISO, but I couldn’t get it how I wanted it (there was always too much light resulting from the shutter being open for too long). Perhaps adjusting shutter speed in M mode or investing in an external flash would have been a good bet, but either way I had to move around so a tripod was not a practical option. Overall, I have to say this event was quite a challenge for me and I did learn a lot just from going out there and trying. Shout-out to Health and Wellness Movement for hosting this great event! I had so much fun!
Here are some of the highlights from the night. Enjoy!
~~~
These shots captured the nightclub atmosphere.

The party begins…


Face Painting!!!


Zen.


Our amazing crowd 🙂


Creative shots.


And lastly, it wouldn’t be Bonnie Chow Photography without some bokeh ❤


~Bonnie
Since last year, I have always had “re-shoot waterdrops” on my photo list. This weekend I got around to it. Despite not having done anything to do with the external flash for a very long time, I figured out the set-up very quickly. I’d say the second time around went way smoother, compared to last year. I was able to focus on getting the shoot instead of the technicalities behind it. The splash would be light up by the flash and that would indicate to me if I had gotten the shot or not. This skill was something I have developed.
My favourite:

Some others:


Over the long weekend, I did a wedding photoshoot for a client. It was a very hectic day and I was on my feet for 12 hours straight. I have learned a lot over the course of my experience as a intern wedding photographer. Here are some main things I picked up:
• Be bold, but never obstructive (This is during the ceremony mainly…I never know where to stand.)
• Create a ‘Shot List’ for formals (This helped me to stay organized and on track of things. It also puts pressure off you knowing you haven’t missed a single shot.)
• Wedding Photography Family Photo Coordinator (This part of the day is chaotic. Having someone who knows the family well will be very helpful.)
• Shoot the small details (Don’t lose track of the small things.)
• Consider Your Backgrounds
• Change Your Perspective
• Fill flash is your friend (I have become more comfortable with using flashes in low lighting conditions.)
• Continuous Shooting Mode (This allows me to never miss a moment.)
Here are some black and white conversions of some of my favourite photos from the wedding.
Wedding Cake Decor: I wanted to incorporate the streak of light in the background to create depth and interest in the black and white conversion.

Portrait: I am happy with how this simple subject turned out.


Some things I kept in mind while shooting with black and white in mind included, contrast, texture, and defined shadows and highlights. I was shooting in RAW for most flexible post-manipulation and a fairly low ISO to reduce noise, in the blacks especially. I like how black and white is suitable for almost any occassion.
On this shoot, my goal was to capture the details in the sky as the sun was setting. I was to strengthen my skills shooting in manual mode . I also wanted to experiment with shooting panoramic images. During the shoot, I keep in mind that I may want to incorporate theses images into composite (backgrounds) in post production, but in the end I did not use any of these shoots for my composites as I came up with other ideas.
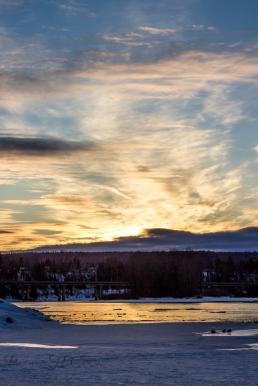
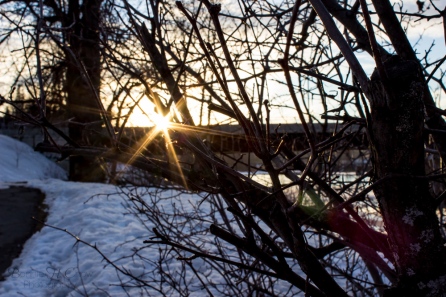
My first panorama images:


Notes when shooting:
(Shoot in manual; lock in shutter, aperture, ISO; portrait orientation; 1/4 overlap)
Notes in Postproduction :
(Program: Photoshop CS6 Merge to Panorama)
(Edit–>Fill–>Content Aware Fill)
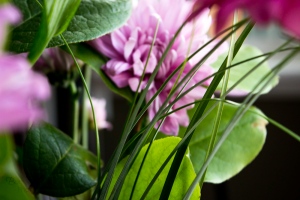
Over spring break, I managed to find some decently bloomed flowers in my house. I took the chance to photograph this rare occasion.
A Different Perspective (The Other Side)
I spotlighted the greenery in the bouquet instead of the main flowers. The fillers in bouquets are often overlooked.


Here are some others…


This week I focused on building my techniques and workflow for creating composite photographs. To begin, I figured I would combine a studio lit photo of Erica and a background with interesting texture and colour to begin constructing a basic composite in Photoshop. One of the most important things I learned was how to adjust and correct the lights and darks by utilizing a black and white layer; also adjusting and correcting the colours by using levels and/or hue and saturation layers in Photoshop. Clipping masks were used to only apply the layer effect on select layers. Global adjustments were used to further blend the hues and tones of the two photos together. I also learned more advanced techniques for refined edges of my selections, which is very important in fine tuning and details of the photo.

I was going for a edgy textured background with cooler colours to complement Erica’s blue hoodie in the first photo. I also wanted to create a higher contrast overall to go with the edgy theme as some of the colour and tone blending using levels flattened the photo a bit.

In this photo, I leaned more towards the warmer, pink tones. Her face is still a bit brighter compared to the background. This should be further adjusted in Photoshop. A soft lightening of the background behind my subject was added to separate her from the background more.
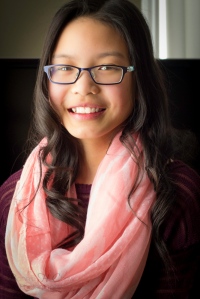
Over the weekend, I did a shoot with my cousin, Joey. I did her hair and chose her outfits. Although we just goofed around most of the time, (much camera shake…oops), I did get some shots. The lighting conditions were decent that day. It was just barely sunny, but not too bright or overcast. I started off inside and tried different window setups. The soft, back window lighting (the first photo below) seemed to work best. There are a few distractions in the corners of each photo which could have been eliminated through post-production, but we are focusing on lighting here.

I also tried to capture some silhouettes. I really like how these turned out, especially the middle photo where not all the colour/form is taken out. This was shot in Manual with a small aperture (to get a sharp edge) and low ISO (to reduce noise in silhouette shape itself). I aimed for an uncluttered, bright background to offset a dark subject to provide that contrast difference.

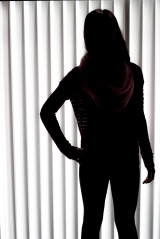

I really like how this one turned out.

Next, are the outdoor photos. All of these were taken in the shade in the soft natural light.


Last week, I went into the studio to try and get more comfortable with the studio lights. I particularly focused on trying out common portrait lighting styles for the first time. I learned how to get an accurate exposure reading in Manual mode in order to correctly light the subject without it being influenced by any background changes. There are four main types of studio lights that we used: the key light, the fill light, the hair light, and the background lights to brighten the backdrop. I learned to turn on each of these lights individually to see exactly where the lights and shadows fall on my subject. The key light was used for getting the exposure reading and lighting up the main highlights on the face.
Here is an example shot with just the key light. The light was place at a 45 degree angle to the model which creates Rembrandt lighting.

Here is just the hairlight. My model’s hair was fairly dark, so 3/5 of the lights in the softbox were turned on.

These are shot with both the key, fill, and hair lights. The fill light was considerably less powerful than the key light. The shadows could have been lit up more with the fill light. It would have been considered loop lighting if the shadow created with the key light connected with the one on the right side of her face. In terms of post-production, I learned techniques with the adjustment brush relative specifically to portraits such as soften skin, teeth whiten, and iris brightning. Both of these examples are definitely on the high key side of things.


At the end of the block, we tried to fit in split lighting where two lights are placed on either side of the model at 90 degrees to the camera. The shadows cast on exactly half of the face creates a more edgy feel to the photo.

This is an example of butterfly or beauty lighting from the previous day in the studio. It is done with two lights positioned in front of the model (front lighting) in a “clamshell” arrangement. I was shooting from between the two lights. This kind of lighting creates a barely noticeable butterfly shadow just under the nose and the brights on the face add a soft, glamorous look.

People always say natural lighting is the best; nothing beats it. After this trial, I am becoming more familiar with the capabilities of studio lighting. But overall, I still generally prefer natural lighting. Studio lights can create specific artistic looks and I would definitely like to keep on going with it, but natural lighting is much more adaptable.
