
I decided to go on a photo walk around campus on night after dinner. I love how vibrant the colours around us become shortly after it rains.
Category Archives: Inspiration


Campus Collection: Night Views
06-26-2017

Peak Views

Light Up the Night Sky
Student Government Campaign Shoot: Michelle Chen
02-21-2017
I did a shoot for my dear friend who lived on the same floor with me in residence. She was running for multiple student leadership positions and needed photos for her campaign.
Here are the official poster media.


Here are some of my favourites that didn’t make the final cut.


You may want to know the results of the elections. Michelle won all of the positions she ran for after a week of long nights, hard work, dedication, genuine care, stress, deep chats, and ice cream bars. This included VP of the upper year tower (head of all programming and tower events) and Student Council Arts Representative. I wish her the best of luck in her roles this coming year! …but anyways I know she will be great!


Slow Mornings
01-24-2017
This is a view from the 11th floor of my residence where I lived for the past two years. It’s an old one from earlier in the year as you can see from the winter wonderland scene.

Impromptu Banff Trip: October 01, 2016
This trip was taken on a rainy Saturday and included stops at Bow Falls, downtown Banff, and Lake Louise. Let’s just say, my upper respiratory tract infection was not the only thing that took my breath away today. Enjoy.


Campus Collection no. 1
I got inspiration to pick up my camera lately. Specifically, I have been shooting architecture using a more wide-angle approach. Here are some hand-picked photos from around campus.


I’m still into cityscapes…

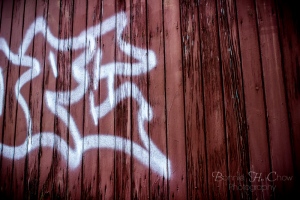
…and interesting textures.

~
Photo Trip: Prince George Railway and Forestry Musuem
This was a bittersweet day. It was probably the last field trip I will ever go on as a high school student. Nevertheless, it was tons of fun and a day to remember. In terms of photos there were tons of cool HDR and texture shoots. The lighting was questionable as it was too harsh and direct sunlight. I made use of lens flares and star effects; and aimed to shoot in the open shade or with the sun as backlight. When we first arrived, I wasn’t overly inspired or creative enough to dive right in a start shooting because the setting was kind of out of my style. I soon found interesting subjects and looked for different perspectives that others may not capture. My goal was for every picture to be shot with a purpose or to include an interesting element, like a lens flare, HDR, cool foreground, or contrasted textures.
~~~
Highlights: I really like how these shots turned out.


Texts and Textures: These flat designs were emphasized with some post-production. The texture combined with the contrast and texts really made these photos stand out to me.

Foreground interest:


Dreamscape:

Flower Splash
This was apparently a long-awaited-for post. I was deciding whether or not to upload this composite. I was not completely happy with the “green version” of this because the water drops did not blend that well with the shapes in the background photo. I decided to put it on a black background to see the effect it would have; I like the simplicity of it. To give it more dimension, I added a glow from the bottom left corner and a neon line. It took a lot of blocks and layers in Photoshop. Through this process, I became more comfortable with managing layers. Next time, I think a little more planning beforehand would have been better and would have made for a much less painful process. I really liked how the wave at the bottom turned out. the shape was able to fit the way I wanted it to fit into the photo.

Bottle Splash
Recently I have been working on producing composite images. I just completed my second Photoshop composite of the semester. Here are the photos it consists of.

Post Production:
White background added.
Layer masking after selections to get the separate parts.
Displacement mapping was used to create the blur of the bottom of the bottle as the eye would see it through the water.
There were two layers of the splash itself; one above and one under the bottle layer. The opacity of the one on the top was lessened in order to let the bottle show through a little more. (in a gradient manner, less opaque near base) The splash was also warped and transformed to shape to better work with the shape of the bottle. The opacity of the reflection was also brought down.
Level adjustments were added to blend the lighting further.

I like the detailed sharpness of this photo and the fresh blue/green tones. Something I noticed that could be improved is that the edges of the bottle are not very distinct because it is too “blown out”.
Making a Splash: Flash Photography
Since last year, I have always had “re-shoot waterdrops” on my photo list. This weekend I got around to it. Despite not having done anything to do with the external flash for a very long time, I figured out the set-up very quickly. I’d say the second time around went way smoother, compared to last year. I was able to focus on getting the shoot instead of the technicalities behind it. The splash would be light up by the flash and that would indicate to me if I had gotten the shot or not. This skill was something I have developed.
My favourite:

Some others:


